The bookshelf was the second piece of custom furniture for Callan’s room following the successful completion of the cubbyhole shelf. The inspiration for this bookshelf came from one we found at Ikea.

We were just about to buy it when I decided it cost too darn much for a cheap P.O.S. bookshelf. So there I was, in the middle of Ikea, trying to convince Shanna I could build it better, cheaper, and most importantly in time for Callan’s arrival. Shanna reluctantly agreed to allow me to attempt this project.

As you can see in the picture above, the Ikea bookshelf cost $200. The dimensions of the bookshelf were 60” tall, 40” wide, and 12” deep. We copied this size for our bookshelf… but for $80.
Material List:
1. 8x4 Sheet of 3/4” Birch Plywood A/A - $40 from Lowes
2. 8x4 Sheet of Bead board - $20 from Lowes
3. Birch Tape for edges - $8 from Lowes
4. Trim, Paint, Etc: $12 estimate
The Build:
The box was basically 12” strips of the plywood. If you were going to stain the shelf you would need two pieces of plywood to keep the grain going the same direction, but since we painted it did not matter for us. The construction is based on my dad’s favorite technique of notching grooves for the shelves. By doing this it increases the strength and stability of the shelf. The notches are 3/8” deep and ¾” wide. The picture below shows the box pieced together. The shelf is upside down in the picture… the open end is the top where we capped it instead of using a notch because we trimmed the top.

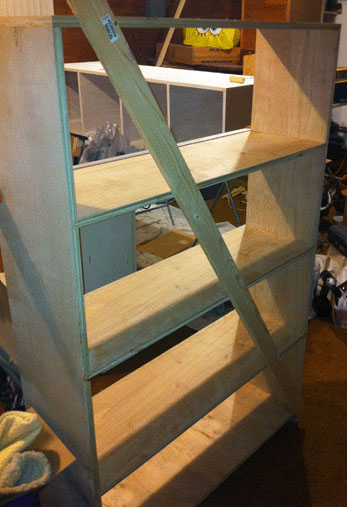
The next picture shows the box glued and nailed together. You can see how the top cap piece is full length. While the glue dried we nailed a stabilizer bar to keep the shelf square.

Next we trimmed and placed the bead board back on the shelf.
The next picture shows the detail of the top trim and bead board. We use the birch tape to cover the edges of the plywood.
 With the unit built, it was time to paint.

No comments:
Post a Comment